ESP8266 WiFi Module - NodeMCU price and specs
ESP8266 WiFi Module - NodeMCU price and specs
Introduction
NodeMCU is an open source firmware based on LUA and developed for the ESP8266 wifi chip. When exploring functionality with the ESP8266 chip, the NodeMCU firmware comes with the ESP8266 development board - the NodeMCU development board. It is perfect for use with IoT or Internet of Things projects.
Since NodeMCU is an open source platform, its hardware design is open for editing, modification and development.
The NodeMCU Dev Kit board consists of the ESP8266 Wi-Fi enabled chip. A low-cost Wi-Fi chip, ESP8266 is developed by Espressif Systems with the TCP / IP protocol stack built in.
Features
The NodeMCU is
- Open Source
- Interactive
- Programmable
- Low cost
- Simple
- Intelligent
- Enabled for Wi-Fi
- USB-TTL included
- GPIO Programming included
- A2D & PWM included
- Easy to connect with other development modules
- Plug & Play
The NodeMCU development kit has analog (i.e., A0) and digital (D0-D8) pins on the board.
It also supports serial communication protocols including UART, SPI, I2C, and also natively supports PWM and A2D conversion.
Using such serial protocols we can connect it to serial devices such as the I2C-enabled LCD screen, the HMC5883 magnetometer, the MPU-6050 gyro + accelerometer, RTC chips, GPS modules, touch screens, SD cards, etc.
Most importantly, it has a built-in WiFi chip, that lets you connect to TCP/IP LAN networks and make use of these features in IoT projects.
Recommended on Amazon:
NodeMCU Specs
- Developer: ESP8266 Opensource Community
- Type: Single Board Microcontroller
- OS: XTOS operating system
- CPU: ESP8266
- Memory: 128kBytes
- Storage: 4MBytes
- Power: USB
- Power voltage: 3.3V, 5V (used with the 3.3v regulator that is built into the board using the VIN Pin)
- Programming: Arduino Cpp
- Compatible IDE: Arduino IDE / ESPlorer IDE
- GPIOs: 10
Getting Started with the NodeMCU
To start using NodeMCU for IoT applications we first need have the NodeMCU firmware on the NodeMCU Development Board. Luckily, most common NodeMCU development boards today come with a pre-installed firmware, usually the Lua-NodeMCU one.
Choosing the NodeMCU Model
Now, we choose and buy a NodeMCU. There are 2 main types of NodeMCU
- CP2102 (aka, the thin one)
- CH340 (aka, the thick one)
These are both identical except for the USB communication driver and the size or form factor. The CP2102 model is the thinner of the two, having a breadboard-friendly pin build, allowing you space on the breadboard to connect peripherals to it. The CH340 model, on the other hand, takes up the entire space on the breadboard.
Apart from that difference, both models perform identically, and might very slightly vary on price.
Recommended on Amazon:
Choosing a Development Environment (IDE)
For programming the NodeMCU, we must choose an IDE, or development environment. This is where you write the code, have it compiled and then flashed to the NodeMCU. There are 2 IDEs to choose from:
- The ESPlorer IDE
- The Arduino IDE
The ESPlorer IDE lets you use LUA scripts to program the NodeMCU. Lua is an open source, lightweight and integrable programming language built on the C programming language. This IDE is native to the NodeMCU and is designed specifically to work with it. So the experience is extremely smooth.
The Arduino IDE is another way to develop with the NodeMCU using a well-known and supported environment. This makes it easier for Arduino developers than learning a new language and IDE for NodeMCU. So programming the NodeMCU becomes as easy as writing the program, selecting 'NodeMCU' as the board and clicking on upload - very similar to programming any Arduino Board.
From our experience, using the Arduino IDE is the better choice, given its ease of use, familiarity, online support and trust. You can install this IDE from Arduino's Software Page.
Once you have the Arduino IDE Software, you need to set it up to support the NodeMCU. It's very simple. Simply follow the steps on our NodeMCU board installation guide for Arduino IDE.
Programming your first Sketch with Arduino IDE
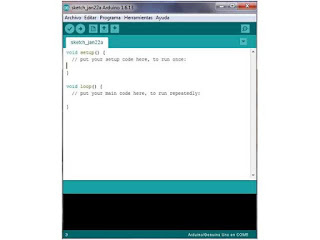
Once you have the IDE set up, write your program and simply follow these steps to flash it to the NodeMCU:
- Use a standard Micro USB cable to connect the NodeMCU to your PC
- Make sure you have followed our NodeMCU board installation guide for Arduino IDE
- Open the Arduino IDE
- Choose the Board from Tools > Boards > ESP8266 Modules and select the NodeMCU 1.0 board (ESP-12E Module)
- Make sure that your PORT number is right
- Other optional settings
- Load using: Serial
- CPU frequency: 80Mhz
- Flash Size: 4M
- Upload Speed: 115200
Now click 'Upload'. Your sketch will compile and then flash to the NodeMCU within about 45 seconds.
If that doesn't happen, cross check the above settings.
Recommended on Amazon:
Example Sketch
Here's a sample LED Blink sketch that you can use as your first test program.
 |
| NodeMCU inbuilt LED Flash |
void setup () {
pinMode (LED_BUILTIN, OUTPUT);
}
void loop () {
digitalWrite (LED_BUILTIN, HIGH);
delay (1000);
digitalWrite (LED_BUILTIN, LOW);
delay (1000);
}
Conclusion
This article should help you understand and get started with the NodeMCU Board. The NodeMCU is very useful for IoT programming and development. In fact, we extensively use it for R&D and Prototyping at Device Interactions.This could be a step closer to building your own products.
Recommended on Amazon:


The recreation has multiple of} versions featuring totally 카지노사이트 different bonus payouts based mostly on the rating of the 4 of a form. Video poker grew to become more firmly established when SIRCOMA, which stood for Si Redd's Coin Machines , launched Draw Poker in 1979. Throughout the 1980s video poker grew to become more and more well-liked in casinos, as folks discovered the devices much less intimidating than enjoying in} desk video games.
ReplyDelete