Arduino IoT projects – getting started with a SIM900 GSM Module with example
Arduino IoT projects – getting started with a SIM900 GSM Module
Introduction
IoT projects have become a culture among developers, and in the midst of some very interesting projects and business opportunities, the Tech market is booming with huge new investments being made on it. One of the key aspects of the internet of things is the capability of remote controlling devices from anywhere in the world. Dedicated networks are therefore being designed for such applications.That's why we think you should know how to make your own IoT products!

Many IoT products have used WiFi and RF networks, but suffer from challenges of signal range. To be honest, ‘true’ IoT devices would be location-agnostic and connect to the internet from wherever they may be.
 |
| Arduino IoT Projects. Source: Udemy |
There are also ways of setting up your own IoT projects using Arduino quickly, easily and at minimal cost! Let's get into how to do that.
Choosing a Module
There are several GSM Ardiuno Shields or even stand-alone development modules that allow you to build devices capable of communicating with each other at great distances. There isn’t an official Arduino GSM shield, although a large number of third parties provide GSM shields that work equally well. |
| The Sim900 Chipset found on the GSM Module |
To use the Sim900 Module, you will need a SIM Card with GPRS activated. You simply insert the SIM Card into the module when you want to use it.
This module supports 2G/EDGE networks. So choose your SIM Card accordingly.
Jio works on 4G and unfortunately won't be supported.
Since you can send commands to the Module via UART, you don’t even need a separate library to get started with it. You can simply use the built-in Serial or a SoftwareSerial library.
 |
| The Sim900 Module designed to easily connect with Arduino |
Recommended on Amazon
Setting it up for AT Commands
To set up the SIM900 Module with the Arduino Uno, follow this connection diagram. This SIM900 Module comes with a 12V power port. It must be powered via a 12V 2A power adapter. Make sure that the Arduino and the Modules have their ground pins connected.Follow these connections:
Connect the Module GND to Arduino GND
Connect the Module TX to Arduino Pin 7
Connect the Module RX to Arduino Pin 8
 |
| Connecting the Sim900 Module to Arduino |
This makes sure that the Arduino can send AT commands to the SIM900 and receive results via Serial. All we need to do now is program the Ardiuno to do this, based on what GSM functions we want to try out.
| AT Commands |
HTTP GET - How It Works
The simplest IoT Project using this Sim900 GSM Module has to be sending an HTTP GET request. HTTP GET requests are what browsers use when you open and surf websites. The GET request tells the Web Server that you are a 'Client' or a visitor and you would like to see the contents of that site. The Server then responds by sending the HTTP/CSS/JS structure of the website that your Browser then renders for you. |
| Browser rendering the Webpage from HTML/CSS/JS |
Example Codes
- Arduino GSM Github Repository
- Arduino GSM HTTP GET Example Code
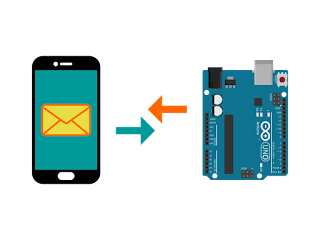
- Arduino GSM SMS Send Example Code
- Arduino GSM SMS Receive Example Code
This is going to be almost the same as surfing the Web, but we won't be rendering anything, since the Ardiuno and the Sim900 Module don't have Browser capabilities. Instead, we will send a GET request to a Server that responds in simple and compact JSON text.
The Test Server
One such Site is https://yesno.wtf/. They also have an API which we will use, and was probably made just for fun. It is basically a random Yes/No generator, similar to a virtual coin toss. You can try this API from your PC here. |
| Response from the Yes/No API. Click to enlarge. |
Your first GSM Project - HTTP GET
This example reads this HTTP response from the GSM Module and prints it onto your Serial Monitor.Use this example code: Arduino Code for this HTTP GET example.Follow these steps:
- Connect your Arduino to the SIM900 Module as explained above
- Plug your Arduino into your PC/Laptop via USB
- Go to the Github code location using the link
- Copy the entire code from the preview
- Open the Arduino IDE Software and start a new project
- Select all the existing text in the Arduino IDE Window and delete it
- Now paste the copied code
- Make sure that your PORT and Board are set for the Ardiuno Uno
- Click on Upload
- Once Uploaded, open the Serial Monitor
- You should see the results of the code here!
Also check the rest of our GSM Github repository for some more sample codes we set up. There are some samples for SMS functionalities as well.

Nice Blog, it is very Impressive.Keep Sharing With us.
ReplyDeleteIoT Training in Chennai
IoT Courses in Bangalore
thnks
ReplyDeleteWe universally disperse our versatile organized foundation through open clouds. As you create your IoT arrangement, able to give basic, mechanized intra-cloud integrative utilizing standard web administrations. IoT SIM Card
ReplyDeleteDear blogger,
ReplyDeleteThank you for sharing your blog post on getting started with Arduino IoT projects. As an embedded software developer, I found your post to be informative and helpful for those who are new to IoT and embedded systems.
One aspect that I believe is worth highlighting is the importance of embedded software development in building IoT projects using Arduino. Developing software for IoT devices requires specialized knowledge and skills, as the software must interact with various hardware components and communicate with other devices over the network.
Embedded software development is a crucial aspect of building IoT projects using Arduino, as it enables the devices to interact with the environment and other devices seamlessly. Arduino provides a range of libraries and tools that make it easier for developers to develop software for IoT projects, but it still requires a deep understanding of the underlying hardware and network protocols.
Moreover, embedded software development is essential for ensuring that IoT devices are secure and reliable. Security is a crucial aspect of IoT projects, as these devices can be vulnerable to cyber attacks and can compromise the user's privacy and data. Therefore, developing secure and reliable software is crucial for building successful IoT projects using Arduino.
Overall, I appreciate your post for providing a comprehensive guide on getting started with Arduino IoT projects and highlighting the importance of embedded software development in building successful IoT projects.
Thank you for sharing your expertise with the community.
Best regards,
Jordan